
Everyone struggles with outdoor portraits. Every once in a while, the light is perfect, but all too often either the sun is shining into your subject’s eyes, or it’s flaring your lens, or it’s directly overhead causing unappealing shadows, or maybe it’s hiding behind dark clouds and making everything look flat and dismal. Problems, problems, problems.
Most people use one of two standard responses to difficult outdoor lighting situations: either they use a reflector to bounce light where they want it, or they use a portable strobe to add light. The common denominator is, of course, ADDING light. If you’re working outside on a bright day, that’s a lot of light. It’ll probably make your subject squint, and feel uncomfortable, and it also probably won’t even look that good.
I prefer a different approach. Instead of ADDING light, I SUBTRACT light. This approach works equally well for either video or photography.
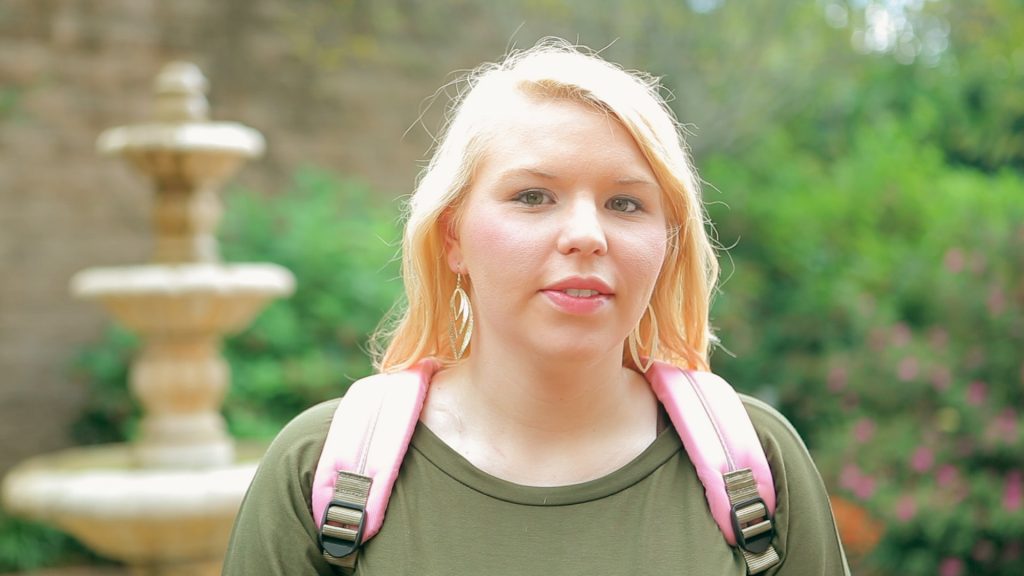
Take a look at this example. I was filming student testimonials for a college promotional video. This particular testimonial was scheduled for around 1 p.m. The sun was almost directly overhead. Look at the way the student’s forehead, nose, and hair are glowing, while her eyes and lower face are in shadow. If you’ve done much shooting outside, you’ll be familiar with this look.
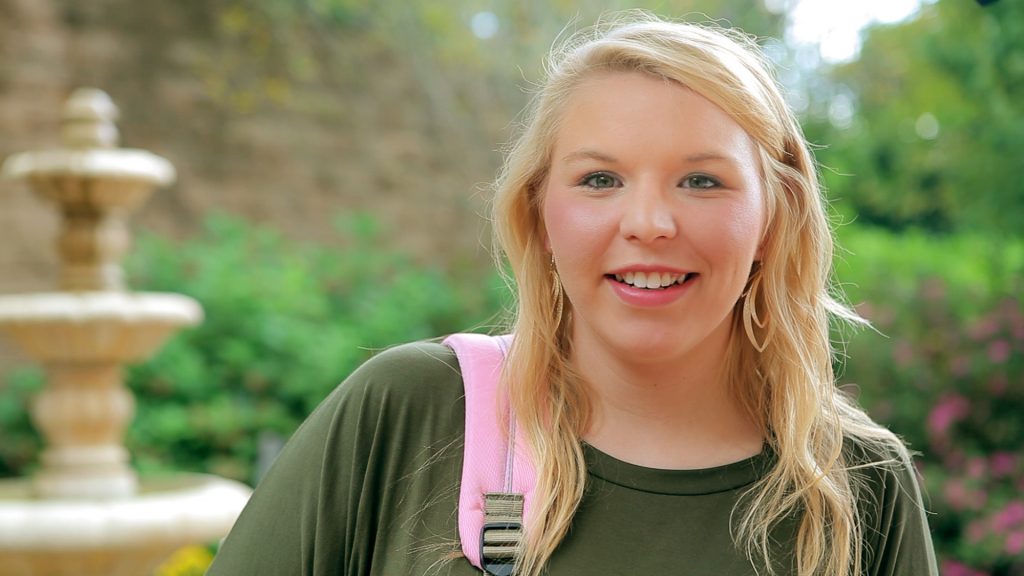
Rather than try to “bounce light in from underneath,” which never works the way it’s supposed to, I simply set up a 60″ umbrella on a stand, to cast shade over her. This way, she’s not being DIRECTLY illuminated by the light bearing directly down on her, but INDIRECTLY illuminated by the light bouncing off the environment around her. As you can see, the lighting still looks very natural, but it’s much more flattering, and it even brings the tones of her hair and skin into the same range as the background, giving me a shot with plenty of detail and no blown-out highlights or gloomy shadows.
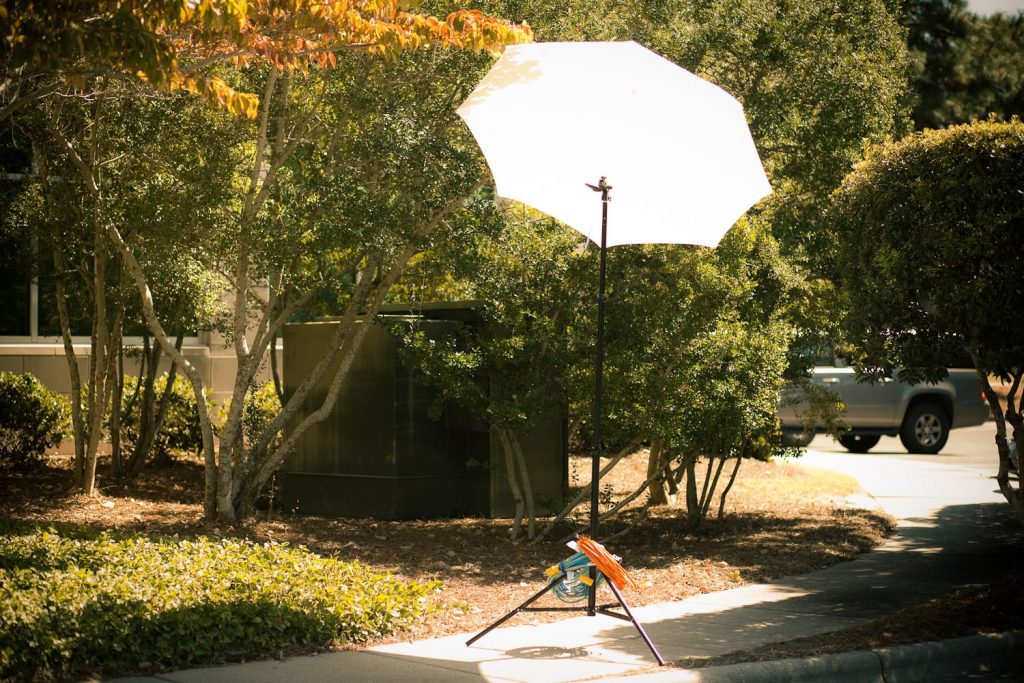
A few days later, I used a similar setup for a corporate photo shoot. The umbrella I use is convertible; it is made of a white material designed to diffuse light, but it comes with a removable outer layer which is completely opaque black. (You can even get a larger, 84″ umbrella kit that’s specifically designed for this purpose.) For the student testimonial, I had used the umbrella with the black layer attached, to really knock out the overhead light, but for these photos, I used the umbrella with just the white layer. It looked like this. Notice how it turns into its own light source, when the sun shines on it. (It was a little breezy out, and I had no sandbags with me, so I used extension cords to weight down the stand. It still blew over a couple of times, so I strongly recommend investing in a couple of sandbags.
The results speak for themselves. These (and the photo at the beginning of this post) were taken outside, around noon, on a sunny day. You will NEVER get this kind of soft, flattering lighting by adding strobes and reflectors to a scene. You can only get it by subtracting light.