If I see one more advertisement for an app, color grading software, or LUT that will miraculously transform low-grade video footage into something that looks like it was shot by a professional cinematographer on an Arri Alexa, I may scream.
Everybody wants their video footage to look like a movie. But movies look very different from each other. Some make everything blue, some make everything orange, some make everything desaturated, some make everything super-saturated. There is no “cinema look,” despite what people selling “cinema-look” products will tell you.
With that said, there are certain attributes of cinematic color grading that are relatively easy to duplicate, and will make your footage look less like an amateur video. I’m going to share one with you today.
Fix Over-Saturated Highlights (AKA Nuclear Foliage)
Nothing screams “video” more than the flourescent highlights on grass and leaves. You will NOT find bleeding-chroma highlights in cinematic movies. Do you know why? Because movies were originally shot on film, and film used a chemical process that made colors less saturated as they got brighter. Even though most modern movies are shot digitally, the colorists make sure that highlights get progressively less saturated as they get brighter. They also desaturate shadows, for a similar reason: shadows should be crisp black, not muddy brown or navy blue.
The good news is: you can do this too! And, it’s fairly easy.
Here’s a simple example. This a still from some footage I shot with a Panasonic GH5. Look at the highlights on the leaves in the first shot, versus the second.
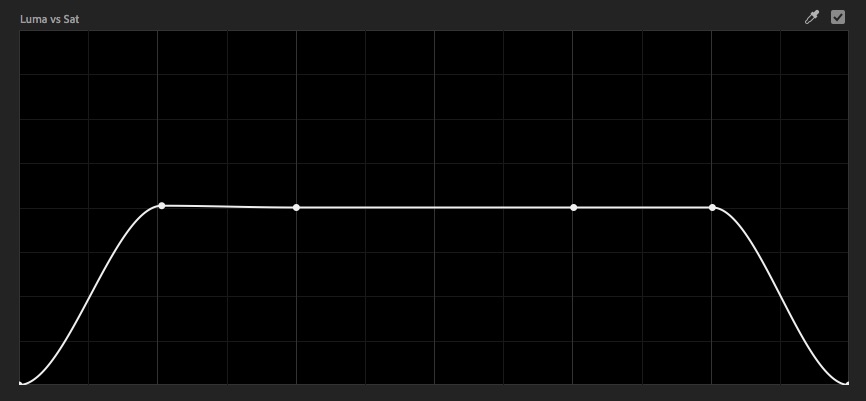
It’s subtle, but once you’ve seen it, you can’t un-see it. If you’re using Premiere Pro, you can apply this effect very easily yourself in Lumetri. Just scroll down to “Curves,” and open “Hue Saturation Curves.” Then click on the graph to create something like this. Once you’ve done this, you can copy and paste it, or save it as a preset.
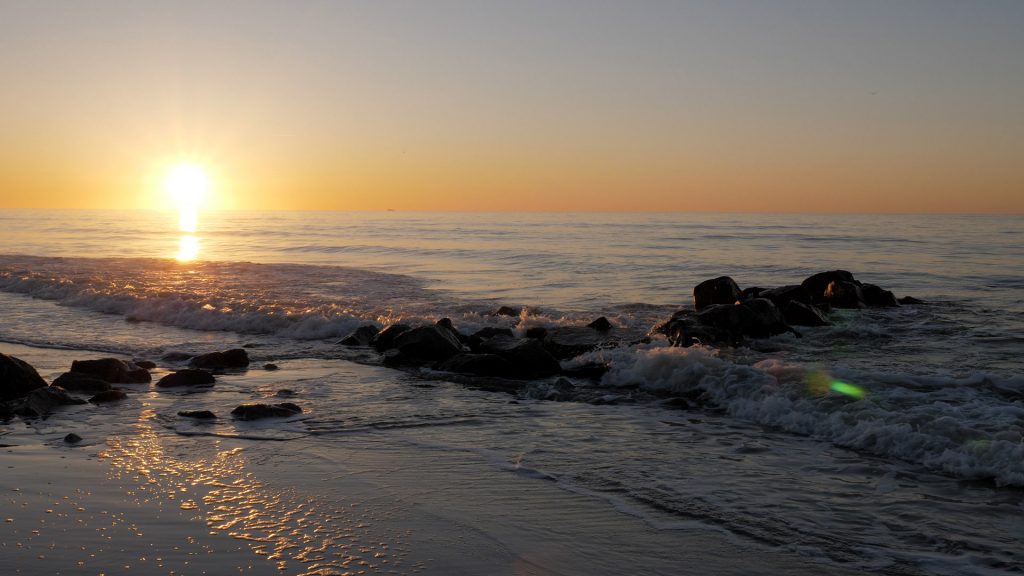
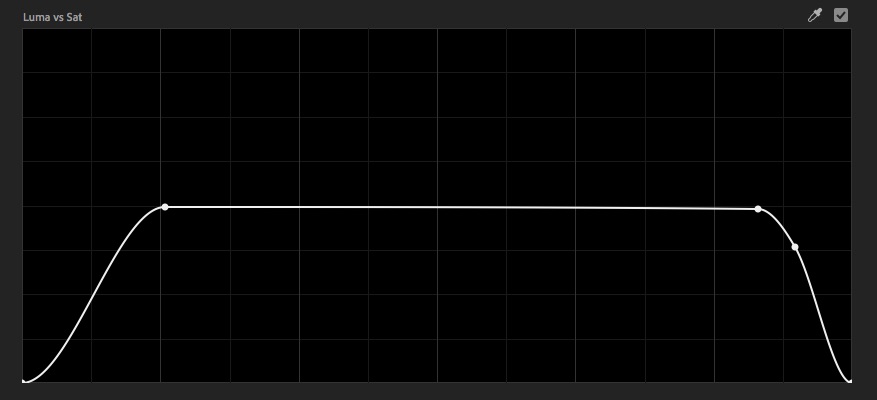
Depending on your preferences, and the shot itself, you may want to start the desaturation a little closer to 100% brightness. For example, on this sunrise shot, I adjusted it a bit to retain some of the golden highlights around the sun, while removing the flourescent yellow corona.


Of course, this is only scratching the surface of color grading, but this is a quick way to fix some of those harsh, discolored highlights that you didn’t know you hated so much until somebody pointed them out!